Wednesday, February 8, 2012

Olifant Outlaw

As part of my learning with Photoshop I decided to create a remake of a picture I took of my wife Jill several years ago wearing the Pachydermos mask, as seen below.

I figured with my new camera and lighting equipment that I could improve on the original, which was not well lit and a bit out of focus.


First I posed her on a white background for easy extraction in a pose similar to the first one, and with most of the same costume.


I then went to stock.xchng to look for free pictures that they offer for the furniture and interior. Here is a great old telephone table that looks like it could be Victorian, which is the look I was after.

After extracting the figure in Photoshop (removing the background) I combined her with the seat, resizing them as necessary to make it look like they went together.


Next I looked for wallpaper and discovered this pattern on DeviantArt, which was offered for free usage.


And back on stock.xchng I found a nice old floor.


I decided that a wanted poster for our heroine would be a nice touch, and created this one in Corel Draw. I then combined all the images, and photographed and added in some miscellany to populate the floor for my final image, seen below.


My original plan was to extract the figure and find a single photo to place her in. I ended up with ten separate images which make up the final picture.

Saturday, February 4, 2012

Krankheit Photo

A new photograph of the black leather Krankheit, my riveted plague doctor mask. Edited in PhotoShop, my new source of delight.

Click on the image to see the detail.

Tuesday, January 24, 2012

Strange Artifact from Tokyo

Bassist/composer Yuki Tsuda of the Japanese band and steampunk unit Strange Artifact recently performed in Tokyo wearing my Ragnarök gas mask. From the report I received the mask was a big hit!


You can read about the band and see more pics on their Facebook page.


You too can own one of these fabulous steampunk gas masks, which I'm selling on Etsy.

Friday, January 20, 2012

Eviction

Another commissioned leather and resin mask. I decided a couple of months ago that I really should learn to take good photographs of my work, and to that end I bought a Canon eos T2i, some good lighting equipment and Adobe Photoshop. I have been studying all three since then, and here, ladies and gentlemen, is my first Photoshopped image of my steampunk leatherwork.


I've titled it Eviction, and I'm quite pleased with how it turned out. Models are my wife and myself. Background is the entry to Empire Mine State Park in Grass Valley, California. The two models and the background were all photographed separately and assembled in Photoshop. What a great program!

Tuesday, December 13, 2011

Fire Breather

The Fire Breather mask is a recently commissioned piece.


Monday, December 12, 2011

Black Bunny Mask

Perhaps my most photographed mask. Here is a selection to enjoy.


This mask can be purchased at my Etsy store.


Wednesday, November 16, 2011

Krankheit

I want to thank everyone who sent in a name idea for my latest plague doctor mask. I received over 200 names, many of them really good, and I had a very hard time choosing my favorite for this mask. Ultimately I chose Krankheit, sent in by Phoenix, for both its sound (pronounced like "Cronkite") and appearance, and meaning (German for sickness).


Congratulations to Phoenix for winning the Krankheit plague doctor mask in black. I am selling these in both black and white on Etsy.


Phoenix, please post your email so I can get your mailing address.

Tuesday, November 1, 2011

Naming Contest for Plague Doctor Mask

I've had many people want my classic plague doctor mask but wished it didn't cost so much ($285). Much of the cost comes from the hours and hours of handstitching that goes into each one, so I have designed a variation that is faster to make. I have replaced most of the stitching with metal rivets, which not only lowers the price ( to $195) but gives the mask an edgy steampunk look.


I've kept the shape of the mask as close to the original as I could, so it still has a look of historical accuracy. Here is the original classic plague doctor mask on the right, and the new riveted mask on the left.

I took some photos while making it, shown here. Once the holes are cut the two-part rivets are set by hand.

Then hammered together with the ball peen hammer on a steel shoemaker's anvil.


Here is the mask all riveted together, ready for the eyepieces to be stitched in place and then painted.

And here is the completed mask all painted black and with gray acrylic lenses.


I'm holding a contest to come up with a name for the new mask. It will run until midnight PST, November 15, 2011. The winner will receive the mask pictured, which is the first one I've made. Winner will have to pay for shipping from Penn Valley, California, US. I will be sole judge to determine the winning entry.


To give you an idea of what I'm looking for, here is how I named my other steampunk plague doctor masks. Beulenpest is the German word for bubonic plague. And Ichabod is named after Ichabod Crane from The Legend of Sleepy Hollow, because the long beak reminded me of a crane's. So send in your creative names for the new riveted mask (by commenting on the blog post), and maybe you will win. You may submit as many entries as you like. In the event of duplicate entries of the winning name the first posted in this blog will be the winner.


Sunday, October 16, 2011

PSHoudini meets the Top Hat.....

....and here is the result.
Photoshopped picture of Donald Trump by Brazilian artist PSHoudini.

Tuesday, September 13, 2011

Recycling Parts

It occurred to me that I had some gas mask parts that could be combined in a new and different way. If I took the Pachydermos/Olifant leather pattern and made it without the copper ears or the rubber hose trunk, it could serve as a gas mask with a snout. Not out of the question, after making the RHINO mask with the big horn.

For the canisters, almost two years ago I made some custom ones for one mask and then never used them again. That seemed like a good start, and I could easily enough make a variation of eyepieces and fabricate something for the exhaust (to fill the hole in the snout). Using these preexisting pieces would save me a ton of work and allow me to produce a new gas mask in a fairly short amount of time.

Let me explain the history of the different canisters, eyepieces and exhaust ports that I have used in my steampunk leather and resin pieces.


The first steampunk leather piece I made (Sept 2008) was the #43 gas mask, copied from a yard sale find. For one of the eyes I molded and cast a camera lens. For the other I used the end of a flashlight. For the combination canister/exhaust I scratch built it using acrylic sheet, screws and a knob from a camera.


The next mask I made was a respirator I call the Bad Air Transmutator. It has no eyes, and I scratch built the pair of canisters. Two months later (Feb 2009) I made Pachydermos, my elephantine gas mask. It had a lot to it, and I scratch built the matching eyepiece bases and caps.


I made a leather covered vacuum hose, and leather trimmed copper ears, and when it came to the canisters I didn't want to scratch build them as well, so I used the Transmutator canisters. My first recycled piece.


Fast forward to July 2009 when I built the Defender gas mask. I scratchbuilt new canisters, and used a camera zoom for the right eye. For the left eye I used the Pachydermos eyepiece. Recycle #2.


For the indy film After the Fall I modified the Transmutator canister design by shrinking it down and covering it with a metal grid. My first two-part canister. That is the canister I'm using on my latest gas mask.


In Jan 2010 I constructed the RHINO gas mask with everything newly scratch built: Eyepiece base, eyepiece cap, canister and exhaust horn.


In June I made the steampunk plague doctor mask Dr. Beulenpest, using the Pachydermos eyepiece base and a new nonagonal eyepiece cap. For the other eye I used the camera eyepiece from #43.

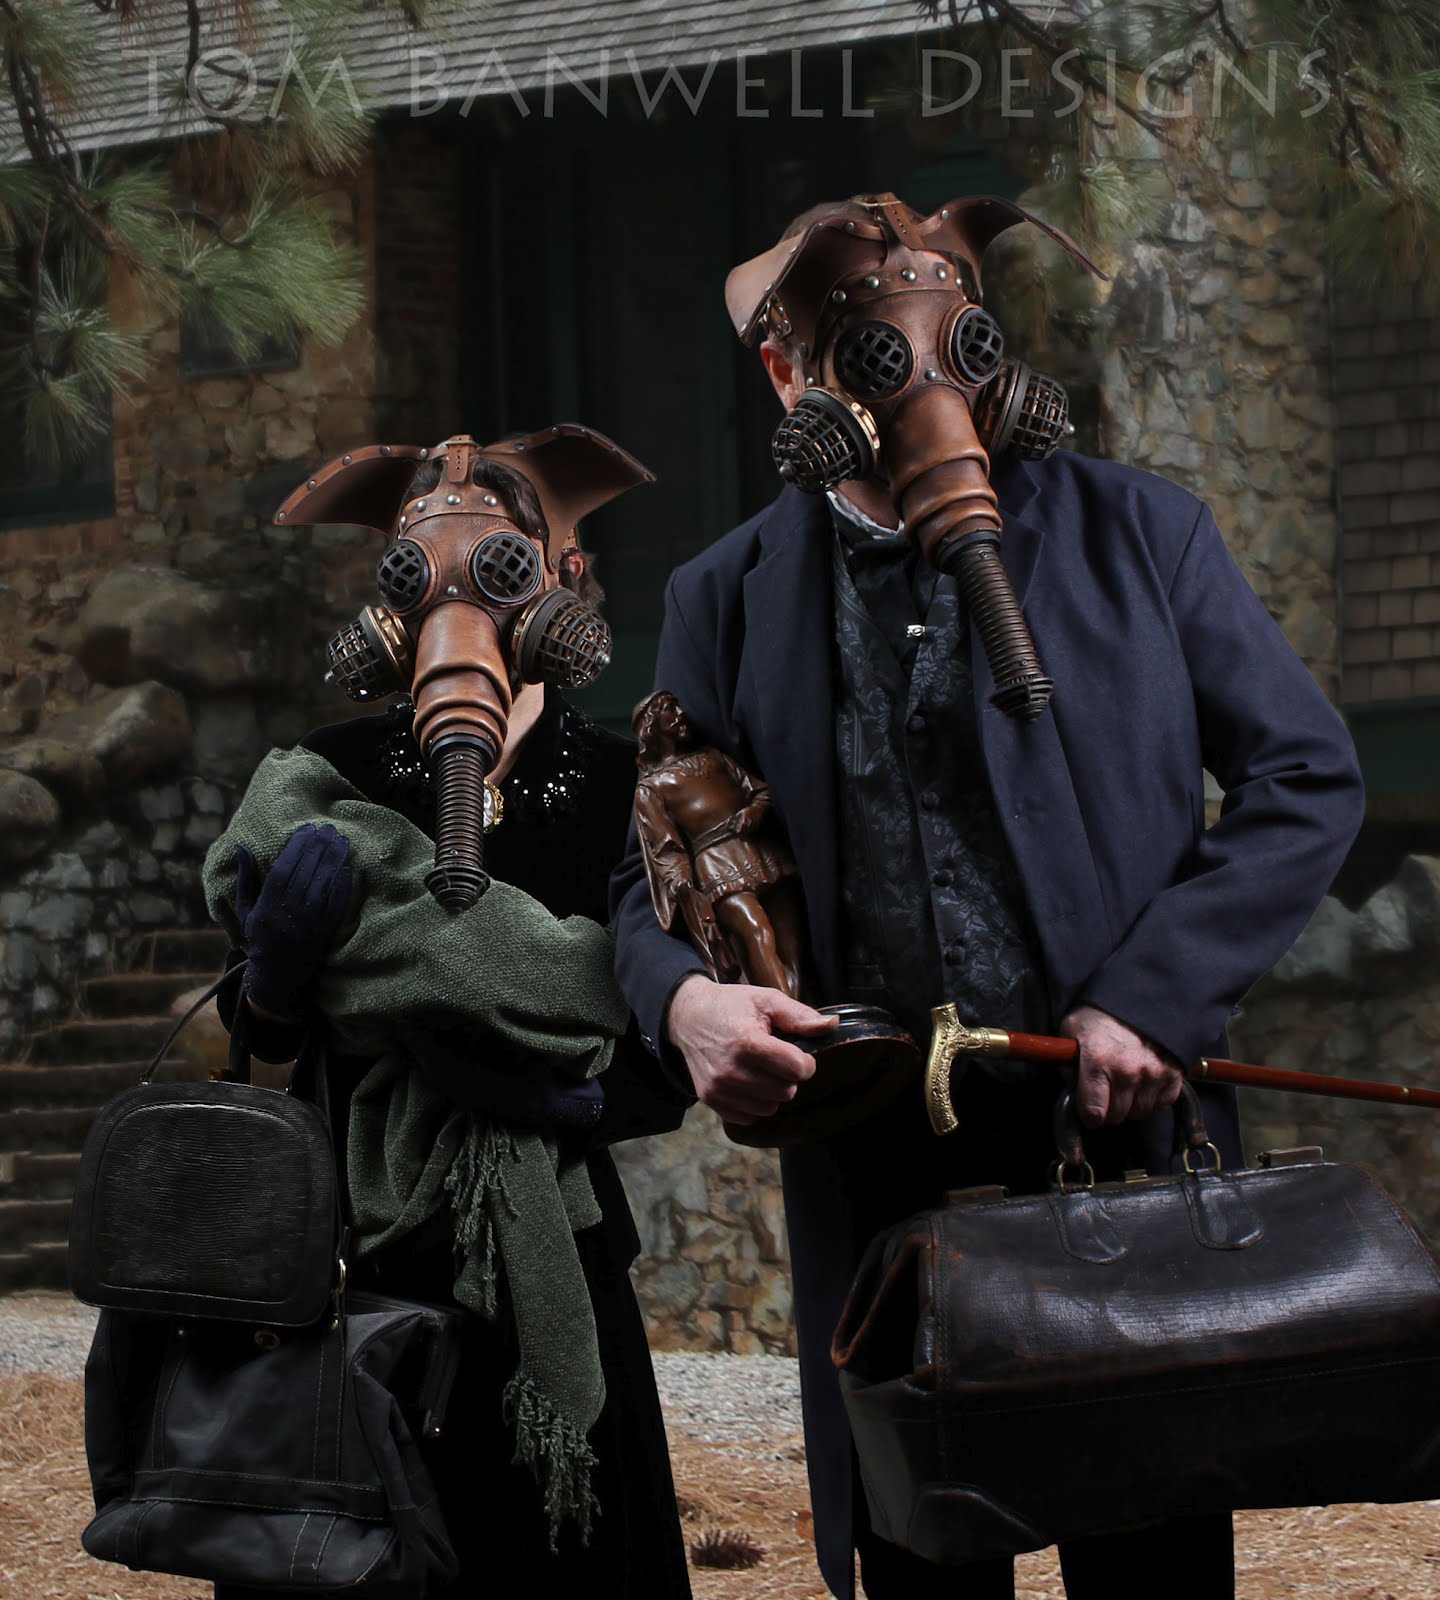
That brings us to my lastest mask Ragnarök, a term which means the end of the cosmos in Norse mythology. For the new exhaust port I'm using the Pachydermos eyepiece base and the Beulenpest cap, along with a circle of drywall sanding mesh and scratch built screen to hold it in place. For the matching eyes I'm using the Pachydermos eye base and a new domed eyecage.


Sunday, September 11, 2011

Domed Eyecage

For my latest steampunk gas mask I wanted to make an eyepiece that was a domed cage. After considering various ways to build such a thing I settled on what I know best, leather and resin. I began by laser cutting a circle of vegetable tanned leather with cross bars, shown on the left in the picture below.

My goal was to have it shaped like the dome on the right, with the cross bars spaced so that the wearer could still see through them adequately.

I stretched the dampened flat piece of leather in three steps. I began with the wooden knob I had used for forming the ear on Pachydermos, shown above on the left. In my wanderings I had collected the steel fence post ends shown above on the right, one with a higher dome than the other that I used for steps two and three.

Once the leather dried it became rigid, and I molded it in silicone rubber. Here is a photo of the leather original on the left, an unfinished cold cast aluminum casting in the middle, and the finished, polished casting on the right.


And here it is placed into the undyed leather mask.

Friday, August 26, 2011

James Vaughan Meets the Minx...

...and here is the result.


I recently designed the Minx mask in red for the Halloween season. We also make it in all black. It is available on Etsy.


James Vaughan Photography blog

James Vaughan Photography on Flickr

Thursday, July 28, 2011

A New Steampunk Gas Mask: Hosehead?

I found this rubber gas mask some time ago at a yard sale, and it is my inspiration and starting point for making a new leather and resin steampunk gas mask.

It is marked USN for United States Navy and I am guessing it is from World War II. Maybe someone out there can tell me.

It is distinguished from any other gas mask in my collection by the two rubber hoses running to a (missing) tank of breathable gases, and that is a feature I definitely want to keep on my mask.

My first challenge is determining how to make the rubber hoses. I looked into simply buying a comparative hose but wasn't having much luck finding it. Then I considered building it out of a small latex tubing covered in leather washers. They would have to alternate large and small to allow for the flexing required.

At this point I am thinking of molding the original (shown above removed from the mask) and reproducing it in black neoprene.

The natural curvature of the hose would make building a plaster mold challenging, and so I inserted a wooden dowel into the hose to straighten it out. Making a rigid mold will now not be so daunting.


I chose "Hosehead" as a working name for the piece (for obvious reasons), but I would like to hear from my reading audience any suggestions for a permant name.