Showing posts with label olifant. Show all posts

Wednesday, February 8, 2012

Olifant Outlaw

As part of my learning with Photoshop I decided to create a remake of a picture I took of my wife Jill several years ago wearing the Pachydermos mask, as seen below.
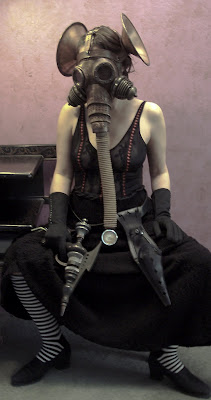
I figured with my new camera and lighting equipment that I could improve on the original, which was not well lit and a bit out of focus.
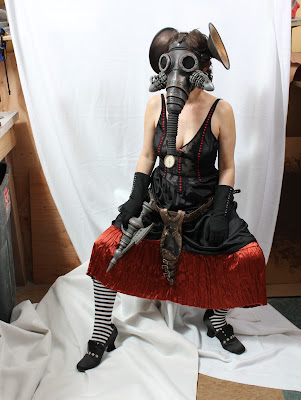

First I posed her on a white background for easy extraction in a pose similar to the first one, and with most of the same costume.
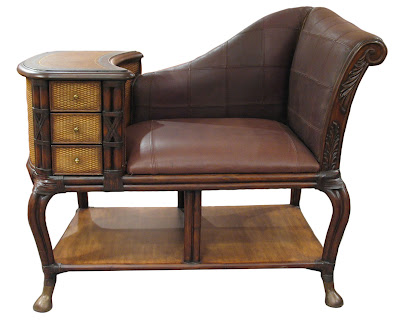

I then went to stock.xchng to look for free pictures that they offer for the furniture and interior. Here is a great old telephone table that looks like it could be Victorian, which is the look I was after.
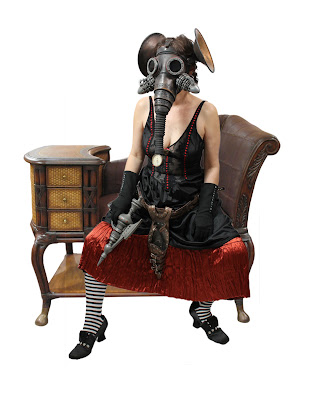
After extracting the figure in Photoshop (removing the background) I combined her with the seat, resizing them as necessary to make it look like they went together.
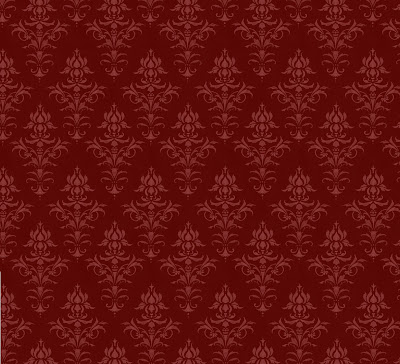


Next I looked for wallpaper and discovered this pattern on DeviantArt, which was offered for free usage.
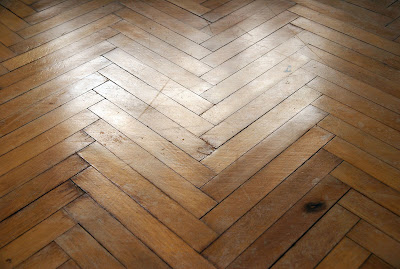

And back on stock.xchng I found a nice old floor.
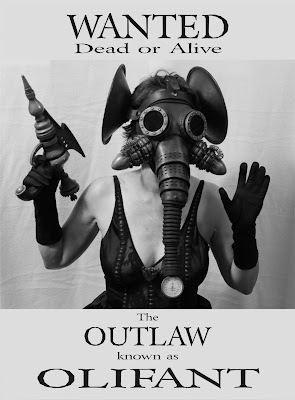

I decided that a wanted poster for our heroine would be a nice touch, and created this one in Corel Draw. I then combined all the images, and photographed and added in some miscellany to populate the floor for my final image, seen below.
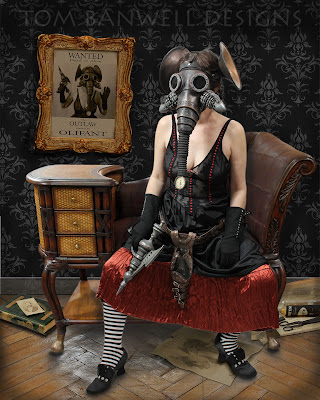


My original plan was to extract the figure and find a single photo to place her in. I ended up with ten separate images which make up the final picture.

Monday, July 25, 2011

California State Fair Fine Art Competition

I entered my steampunk gas mask Olifant into the California State Fair's Fine Art Competition and won an Award of Merit. Whoopie!


They asked for a display case to keep the dirty fingers of the 250,000 expected viewers from caressing my work of art, and I obliged by building a clear acrylic case with black steamy straps and buckles holding it together. Now it really looks sinister. The photo shows it on display.

Wednesday, September 8, 2010

Olifant: The Completed Gas Mask

Here are photos of the completed gas mask Olifant, son of Pachydermos.


Made of veg tan leather that's been antiqued black. Hand sewn with waxed thread. Lenses are tinted acrylic. Lens frames and tusk canisters made of cold cast aluminum, steel wire and bolts. Detachable ears are copper and leather. Gauge is a sphygmomanometer. Hose is black neoprene.


Thursday, July 22, 2010

Olifant Update

I've finished the ears and attached the tusk canisters to the Olifant mask. I've been waiting for my order of custom tinted black neoprene to arrive, only to find out that after traveling across the country the pails began to leak, and FedEx refused to deliver them. So now I'm awaiting the arrival of the new shipment, at which time I will cast the trunk hose.


Monday, July 12, 2010

Olifant: Tusk Completed

The first tusk/canister is now complete, and is shown below on the right. The piece on the left is the casting with the aluminum powder straight out of the mold.


To finish it I sanded, buffed and polished it, then gave it a coating of antiquing. After it dried I screwed in the eight black steel bolts, and attached the coiled wire thingamajiggy on the right. Now it kind of looks like a bomb!

Thursday, July 8, 2010

Olifant: Trunk Fabrication

Pachydermos' trunk was a commercial vacuum cleaner hose that I covered in lambskin wrapped with waxed thread. I like it a lot, but I was thinking how cool it would be if I could build the trunk from scratch. I've decided that neoprene would be an ideal material to make a corrugated hose from (needed for the trunk to bend smoothly), and that is a material I can buy and cast into a plaster mold.

I thought and thought about how to make a steamy corrugated hose, and didn't really come up with much that would still allow it to bend easily, so I decided to put more emphasis on it graduating from a larger diameter to a smaller. After some experimenting I came up with the model above built from laser cut acrylic sheet mounted on a bolt.

To smooth out the surface and to fill in the cracks I've coated it with urethane resin, letting it build up in the recesses.

Over that I've brushed a layer of casting latex, which will make it easier to free from the rigid plaster mold, because it will have a little give.


And here I've started laying plasticine against the bottom half of the model to form one of the two mold halves. Next step will be to pour plaster over the top half.


Monday, July 5, 2010

Olifant: Tusk, Take 2

While going through my collection of yard sale finds, I came across the flashlight shown below. I bought it because I loved its Buck Rogers futuristic look.

Since I've been working on the new Olifant tusk canister, it ocurred to me that the missile end could make a good finial for such a canister. And as I wasn't feeling all tingly inside about the versison I had been working on I decided to begin again with the flashlight as my starting point.


After molding the flashlight in RTV silicone and casting it in urethane resin, I cut out a series of acrylic discs and stacked them around the "missile".


The flashlight has nine vertical grooves spaced evenly around its circumference except for one place, which is wider than the other eight. I decided to add a piece of hardware there above the discs, bigger than the other eight screws which will be added to each finished casting. Then I coated the acrylic discs with urethane resin to seal them and smooth them out so that the canister will rotocast more easily (that's the white stuff in the picture above).


As it was difficult to see what I really had with the white and black and gray all contrasting, I sprayed a coat of white sandable primer, which makes it much easier to view.

Tuesday, June 29, 2010

Olifant: Tusk Construction

In addition to giving Pachydermos' offspring a new set of tusk canisters, I have decided to also give him a new trunk hose. To celebrate that differentiation I have named him Olifant, a variation of the word Elephant.

I have molded the assemblage of brass parts (on the left) and cast it in a gray urethane resin (on the right).


Here I have sanded irregularities, filled cracks with Bondo™, and engraved the cap to match the hex acorn nut that will sit on top and hold the canister against the mask. I've also drilled and mounted twelve brads, which are meant to simulate rivets holding the top to the case.

Saturday, June 26, 2010

Pachydermos Tusk Construction

I'm going to give Son of Pachydermos new tusks, different from his father's, just to make him more interesting. I want them to look a bit like a steampunk boiler, but still tusk shaped.

I've pulled out a box of mostly brass parts that I've collected over the years, most of it from yard sales, but some just hardware store purchases.


Here I've chosen the parts I'm going to start with: A paper cup, a brass doorknob (that I just bought today at a local flea market for 50¢), an acorn nut, and two other parts that I can't identify.

By cutting out the bottom of the cup (and turning it upside down) the doorknob fit right into the hole. The other metal parts are just stacked on top of the knob. I plan on molding and casting this combination, then adding screws and other bits and pieces to punkify it.


Monday, June 21, 2010

Pachydermos Ear Trim

Moving along on the copper ears, I have sewn on the leather trim with needle and thread.

Here I am just starting out with the hand stitching of the waxed thread. I've also exposed the copper to vinegar in order to age it.


Here you can see the multicolored copper, in all its glory. The top ear has the trim all attached, while the bottom ear is waiting to get trim.

This photo is after I have stained the ears a brownish black, darkening everything up, especially the leather.


Saturday, June 19, 2010

Pachydermos Copper Ears

I'm making a variation of Pachydermos, sort of a Son of Pachy. I had made the copper ears for the original Pachydermos before I started my blog, so the steps of how I made them were never recorded. This set of ears is identical to the first except for the color of the trim.

I've started with copper lampshades from an old Wagon Wheel chandelier. These I found at my local thrift shop, but I have also purchased some online at Ebay. I'll be covering the outer edge with leather, so my first step is to make regular indents with a hole punch.


This photo shows the original shade on the left, and the reworked one on the right with its punch marks showing through on the front lip. I have also buffed off the lacquered antique finish that the original came with and which made them look so 1950's.


Next I drill small holes through the copper, using the punch marks to keep the drill bit from wandering.


And here I'm sanding off the rough edges from the drilled copper on a drum sander, so that the holes are smooth enough to allow the waxed thread to pass through without cutting it.