Showing posts with label fiberglass. Show all posts

Tuesday, February 16, 2010

Tauruscat: The Pattern

I have enough of an idea as to how the helmet should look to move forward on this, and so I have begun making the patterns. First I had to create a head form over which to shape the cased leather helmet. To do this I bought a used hardhat and filled it with a harder version of plaster, and stuck a pipe into it so I could mount it in a vise. Then, after popping it out of the hardhat, I shaped the head form with a Surform® (a hand tool which is a combination of rasp and plane) until it resembled my Bavarian helmet.


Next I had to enlarge it so that one size would fit all, which I accomplished by fiberglassing over the plaster with stockinette and polyester resin. The fiberglass was rough and uneven, and so I smeared Bondo™ all over it to fill in the gaps. After sanding it smooth the pink resin and whitish Bondo left a mottled look.

First with a pencil, and then with a Sharpie®, I drew out the patterns. Professor Tauruscat had a strong belief in numerology, with both seven and eleven having a strong significance to him, so I made the skull pattern with seven panels, which will be pierced by eleven holes for mounting the sensors.


Then I laid masking tape over the form, and traced my pattern lines onto the surface so that I could cut them off. The pattern piece on top will be covered with a resin central processing engine as described in the letter. After laying the individual pieces of tape down on cardstock, I will have my patterns, and can then transfer them to the leather.

Wednesday, January 20, 2010

Making a Fiberglass Mother Mold

When making a silicone rubber mold (into which is cast resin) there is typically a supportive outer shell, called a mother mold. Often the mother mold serves another purpose as well, that of containing the liquid rubber while it cures into a solid.

A very simple and easy-to-use container for making many types of molds is a paper cup. I have a supply of picnic and popcorn cups in various sizes for just this purpose. For most castings, the paper cup will work also as the mother mold, keeping the mold parts tightly together while the liquid resin cures. For the Rhino canister mold however, I need a rigid mother mold, and here's why.

Due to the fact that I need the cast part to be as lightweight as possible (so that the gas mask will be comfortable to wear), I am going to make it hollow, and the most efficient way to do this is in a rotocasting machine (which holds the mold and rotates it in two different axis at the same time).

I need to clamp the mother mold (and silicone daughter mold) into the rotocaster, and to withstand that pressure I need a rigid mother mold, as the paper cup will just squash. These pictures document the procedure for making this.

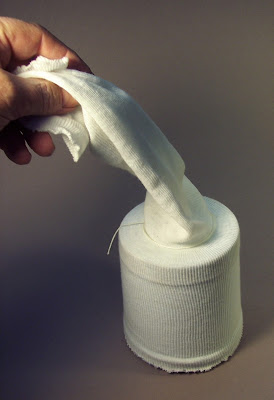
The top picture shows the blue silicone rubber mold after it has been removed from the popcorn cup. Below that I am pulling on a 3" diameter nylon stockinette.

I cut the stockinette long enough so that I could double it over. Here I have loosely tied a string around the top.

Now I have pulled the top half of the stockinette back over the bottom half, so that I have a two layers.

Here I've mixed up polyester resin with an activator (and violet dye), and brushed it all over the stockinette until it's saturated.

And here is the final result after it has cured, with the rigid mother mold on the right.

Wednesday, May 13, 2009

Underground Explorer: Goggles

With every additional piece (snout, comb, lamp and goggles) added to the helmet the weight increases, and along with it the pressure applied from gravity. At this late stage of construction I know of no way to stiffen the leather itself to better support this weight, and so I decided to build a fiberglass inner shell.


Since the original plastic astronaut helmet is made out of poyethylene--a rather slippery synthetic--I figured I could make the fiberglass directly over it. I took a piece of 5" wide nylon stockinette and it just stretched over the plastic helmet. Then I saturated it with polyester resin and after curing I had a thin strong form that matched the inside of the Explorer's helmet.


I cut the fiberglass shell in half, removed it from the form, and trimmed it down to fit my leather helmet. Above you can see it being contact cemented into the helmet.


Next I attached the recently completed goggles, which can easily be removed. The photos show it with the optional snout removed, so that we can see the face inside.